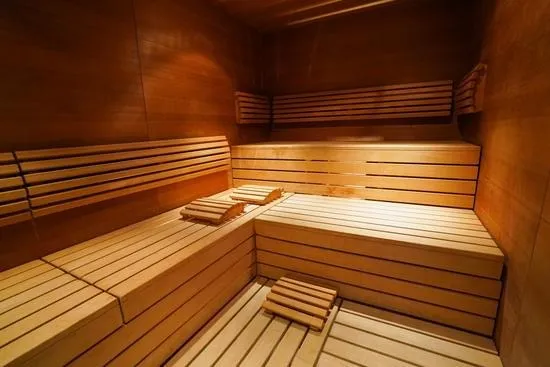
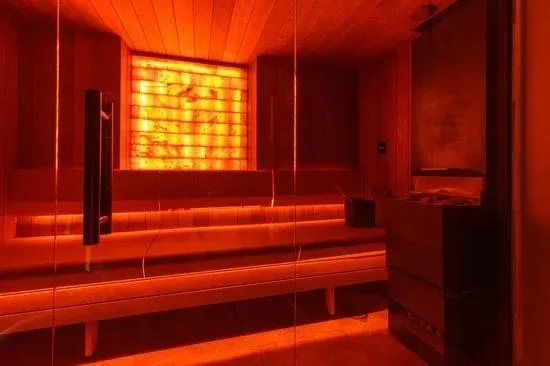
I'll never forget the day our first home sauna arrived. Six boxes stacked on the driveway, assembly instructions that looked intimidating, and my wife Jasmin asking, "Are you sure you can do this?" Honestly? I wasn't sure. But four hours later, we had a functioning sauna in our basement—and I learned that installation isn't nearly as scary as it seems.
Whether you're installing a portable unit, a prefab infrared sauna, or a custom traditional sauna, the process follows similar principles. Let me walk you through everything I've learned from installing three different saunas over the years.
Before You Buy: Critical Planning Steps
The biggest installation mistakes happen before you ever place an order. Here's what you must figure out first:
Choose Your Location
Where your sauna goes matters more than you might think. Consider these factors:
Best locations:
- Basement: Natural temperature control, privacy, usually has concrete floors
- Spare bedroom: Convenient, climate-controlled, easy access
- Master bathroom: Ultimate luxury, shower access, but verify floor support
- Garage: Easy installation, but may need heating/cooling for comfort
- Dedicated room: If you have the space, this is ideal
Avoid:
- Areas with poor ventilation
- Rooms with valuable electronics or artwork (heat and humidity)
- Spaces where weight is a concern (upper floors in older homes)
- Areas exposed to extreme cold (garage in northern climates without heating)
We put ours in the basement initially. The constant 60-65°F ambient temperature meant efficient heating, and the concrete floor eliminated any structural concerns. Later, we installed a smaller unit in our master bedroom for convenience.
Measure Everything Twice
This sounds obvious, but you'd be shocked how many people skip this step. Measure:
- Floor space: The sauna footprint plus 3-6 inches clearance on all sides
- Ceiling height: Most saunas need 6.5-7 feet minimum, plus clearance above
- Doorways: Can the sauna (or sauna panels) actually get into the room?
- Electrical access: Distance to your breaker box matters for installation costs
- Ventilation points: Where can you add ventilation if needed?
Pro tip: Draw it out. Use tape on the floor to mark the sauna footprint. Sit in the space. Can you open and close the door comfortably? Is there room to move around?
Check Electrical Requirements
This is where many DIY plans derail. Different saunas have vastly different electrical needs:
| Sauna Type | Typical Requirements | Installation |
|---|---|---|
| Portable | 120V, 15A standard outlet | Plug and play |
| Small Infrared (1-2 person) | 120V, 15-20A circuit | Usually DIY |
| Larger Infrared (3-4 person) | 240V, 30A dedicated circuit | Electrician recommended |
| Traditional Sauna | 240V, 40-60A dedicated circuit | Professional required |
Contact a licensed electrician for a quote before purchasing. They'll assess your electrical panel capacity and provide estimates. Budget $500-$2,000 for electrical work depending on complexity and distance from the breaker box.

Installation Process: Step by Step
For Prefab Infrared Saunas (Most Common DIY)
What you'll need:
- 2-3 people (some panels are heavy)
- Basic tools: screwdriver, level, measuring tape
- 2-4 hours of time
- The assembly manual (read it completely first!)
Step 1: Prepare the Space
Clean the floor thoroughly. Ensure it's level—use shims if needed. Lay down a protective mat if desired. Have all your tools and parts organized. Trust me, stopping midway to find a missing screw is frustrating.
Step 2: Assemble the Floor and Frame
Most prefab saunas start with the floor panel. Connect the floor pieces, then attach the corner posts. Work methodically. Each piece usually has a specific orientation—pay attention to markings.
Step 3: Install Wall Panels
Wall panels typically slot into the frame. Start with one complete wall, then move around. Have your helper support panels while you secure them. Don't fully tighten screws until all panels are in place—you'll need adjustment flexibility.
Step 4: Wire the Heating Panels
Follow the manufacturer's wiring diagram exactly. Usually, this involves connecting panel wires to a control box. Color-coded wires make this easier than it sounds. If you're not comfortable with electrical work, this is where to call an electrician.
Step 5: Install the Roof
The ceiling panel goes on last. You'll definitely need help here—these are awkward and moderately heavy. Secure it properly; this holds the structure together.
Step 6: Add Door and Accessories
Install the door, benches, backrests, lighting, and controls. Adjust door hinges for smooth operation. Install the control panel where it's easily accessible from the bench.
Step 7: Test Everything
Before your first real session, run the sauna empty for 30-45 minutes. Check for:
- All heaters warming properly
- Even temperature distribution
- No unusual smells (some new wood smell is normal)
- Controls functioning correctly
- Door sealing properly
For Traditional Saunas
Traditional sauna installation is more involved. While some handy people tackle prefab traditional units, I recommend professional installation for several reasons:
Electrical complexity: 240V 40-60 amp circuits aren't DIY-friendly for most homeowners. One mistake can be dangerous and expensive.
Proper ventilation: Traditional saunas need specific ventilation design. Professionals understand airflow requirements for both safety and performance.
Wood treatment and sealing: Proper finishing protects the wood and enhances longevity. This requires knowledge of sauna-appropriate products.
Building codes: Many jurisdictions require permits and inspections for traditional saunas. Pros handle this paperwork.
If you're determined to DIY, budget 8-16 hours for a prefab unit, and 40+ hours for a custom build. Honestly, for traditional saunas, spending $1,000-$2,000 on professional installation often makes sense.
Ventilation: Don't Skip This
Proper ventilation prevents moisture damage and ensures comfortable sessions. Here's what you need to know:
For Infrared Saunas:
Lower humidity means less ventilation need, but air circulation still matters. Options include:
- Built-in vents in many prefab units
- Cracking the door occasionally during sessions
- Leaving the door open after use to dry out
For Traditional Saunas:
These need proper intake and exhaust ventilation. The standard setup:
- Intake vent low on the wall near the heater
- Exhaust vent on the opposite wall, diagonally across
- Some designs use floor-level vents with chimney effect
Research from the Finnish Sauna Society recommends air exchange rates of 5-6 times per hour for traditional saunas. When in doubt, consult with a sauna specialist or HVAC professional.
Common Installation Mistakes
Learn from others' errors (including a few of my own):
Forgetting about clearance space: You need room around the sauna for heat dissipation and access to service panels. Cramming it into a space "just barely" big enough causes problems.
Poor floor preparation: An unlevel floor means crooked doors that don't seal. Moisture-sensitive flooring under the sauna leads to damage. Take floor prep seriously.
Inadequate lighting: Inside the sauna should have appropriate, heat-resistant lighting. But don't forget about lighting the approach—you'll use your sauna in the evening.
Ignoring weight distribution: Saunas are heavy—300-800 lbs when loaded with people. Upper-floor installations in older homes might need structural reinforcement.
Rushing the test period: Run multiple empty test sessions before your first real use. This allows new wood to acclimate and helps you identify any issues.
Not considering resale: If you might move, portability matters. Permanently altering a room for a custom sauna affects home value—sometimes positively, sometimes not.
Post-Installation: First Use
Once installed and tested, here's how to approach your first session:
Season the sauna: Run it empty at full temperature for 1-2 hours. This off-gases any manufacturing residues and allows wood to acclimate. Ventilate the room well during this process.
Start conservatively: Your first real session should be shorter and cooler than normal. 10-15 minutes at moderate temperature lets you experience it without overdoing it.
Establish a routine: Decide on pre-session (hydration, timing) and post-session (showering, cooling down) rituals. Consistency enhances benefits.
Keep cleaning supplies handy: Towels, spray bottles with diluted vinegar, and cleaning cloths should be nearby. Establish the wipe-down-after-use habit immediately.
Maintenance Setup
Set yourself up for easy long-term maintenance:
- Create a maintenance log: Track session dates, any issues, and maintenance performed
- Stock supplies: Keep sauna-safe cleaning products, spare bulbs, and basic tools nearby
- Set reminders: Monthly deep cleans, annual inspections, periodic heater checks
- Document everything: Save installation manuals, warranty info, and electrician contacts
When to Call a Professional
Some situations demand professional help:
- Any 240V electrical work (unless you're a qualified electrician)
- Structural modifications to your home
- Ventilation system installation
- Permit applications and inspections
- If assembly instructions seem unclear or confusing
- If you lack necessary tools or helpers
Professional installation typically costs $500-$2,000 depending on sauna type and location complexity. For traditional saunas, this often makes sense even for handy homeowners.
Final Thoughts
Installing my first home sauna felt daunting. Looking back, it was one of the best weekend projects I've tackled. The sense of accomplishment when we took our first session in a sauna I'd assembled myself? Priceless.
Whether you go DIY or professional, the key is thorough planning. Measure carefully, understand electrical requirements, prepare your space properly, and follow instructions methodically. Most installation problems stem from rushing or skipping steps.
Once installed, your home sauna becomes part of your daily routine. Eight years later, we use ours 4-5 times weekly. That initial installation effort has paid dividends in health benefits, family wellness, and the sheer joy of having a personal sanctuary steps from our living room.
The hardest part isn't the installation itself—it's making the decision to start. If you've gotten this far, you're ready. Your wellness journey is waiting, and your home sauna is the gateway.
FAQs About Home Sauna Installation
It depends on the sauna type. Portable and some infrared saunas are DIY-friendly with basic tools and skills. Traditional saunas typically require professional electrical work. Most prefab infrared saunas can be assembled by two people in 2-4 hours following manufacturer instructions.
Your floor must support the sauna weight (300-800 lbs loaded) and resist moisture. Tile, concrete, and vinyl flooring work well. Avoid carpet. Some people add a waterproof mat under the sauna for extra protection. Ensure the floor is level for proper door operation.
References
- Finnish Sauna Society. "Proper Ventilation Essential for Sauna." Finnish Sauna Society, 2022.
- International Building Code. "Chapter 11: Energy Efficiency." ICC, 2021.


